How Are Cookies Made?
From flour and butter to bakery shelves through mixing, shaping, and precise baking.
The Overview
Cookies are made by combining flour, fat (butter or oil), sugar, and optional mix-ins (chocolate chips, nuts, dried fruit) through a carefully controlled mixing and baking process that creates texture variation from crispy to chewy through temperature and timing control.
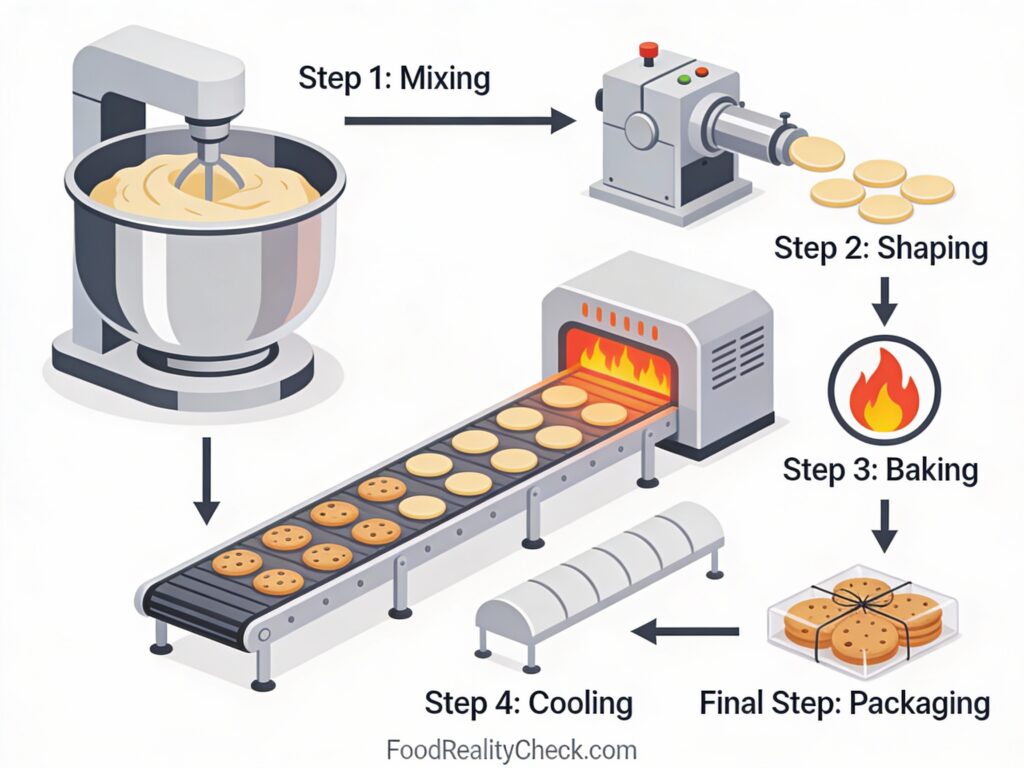
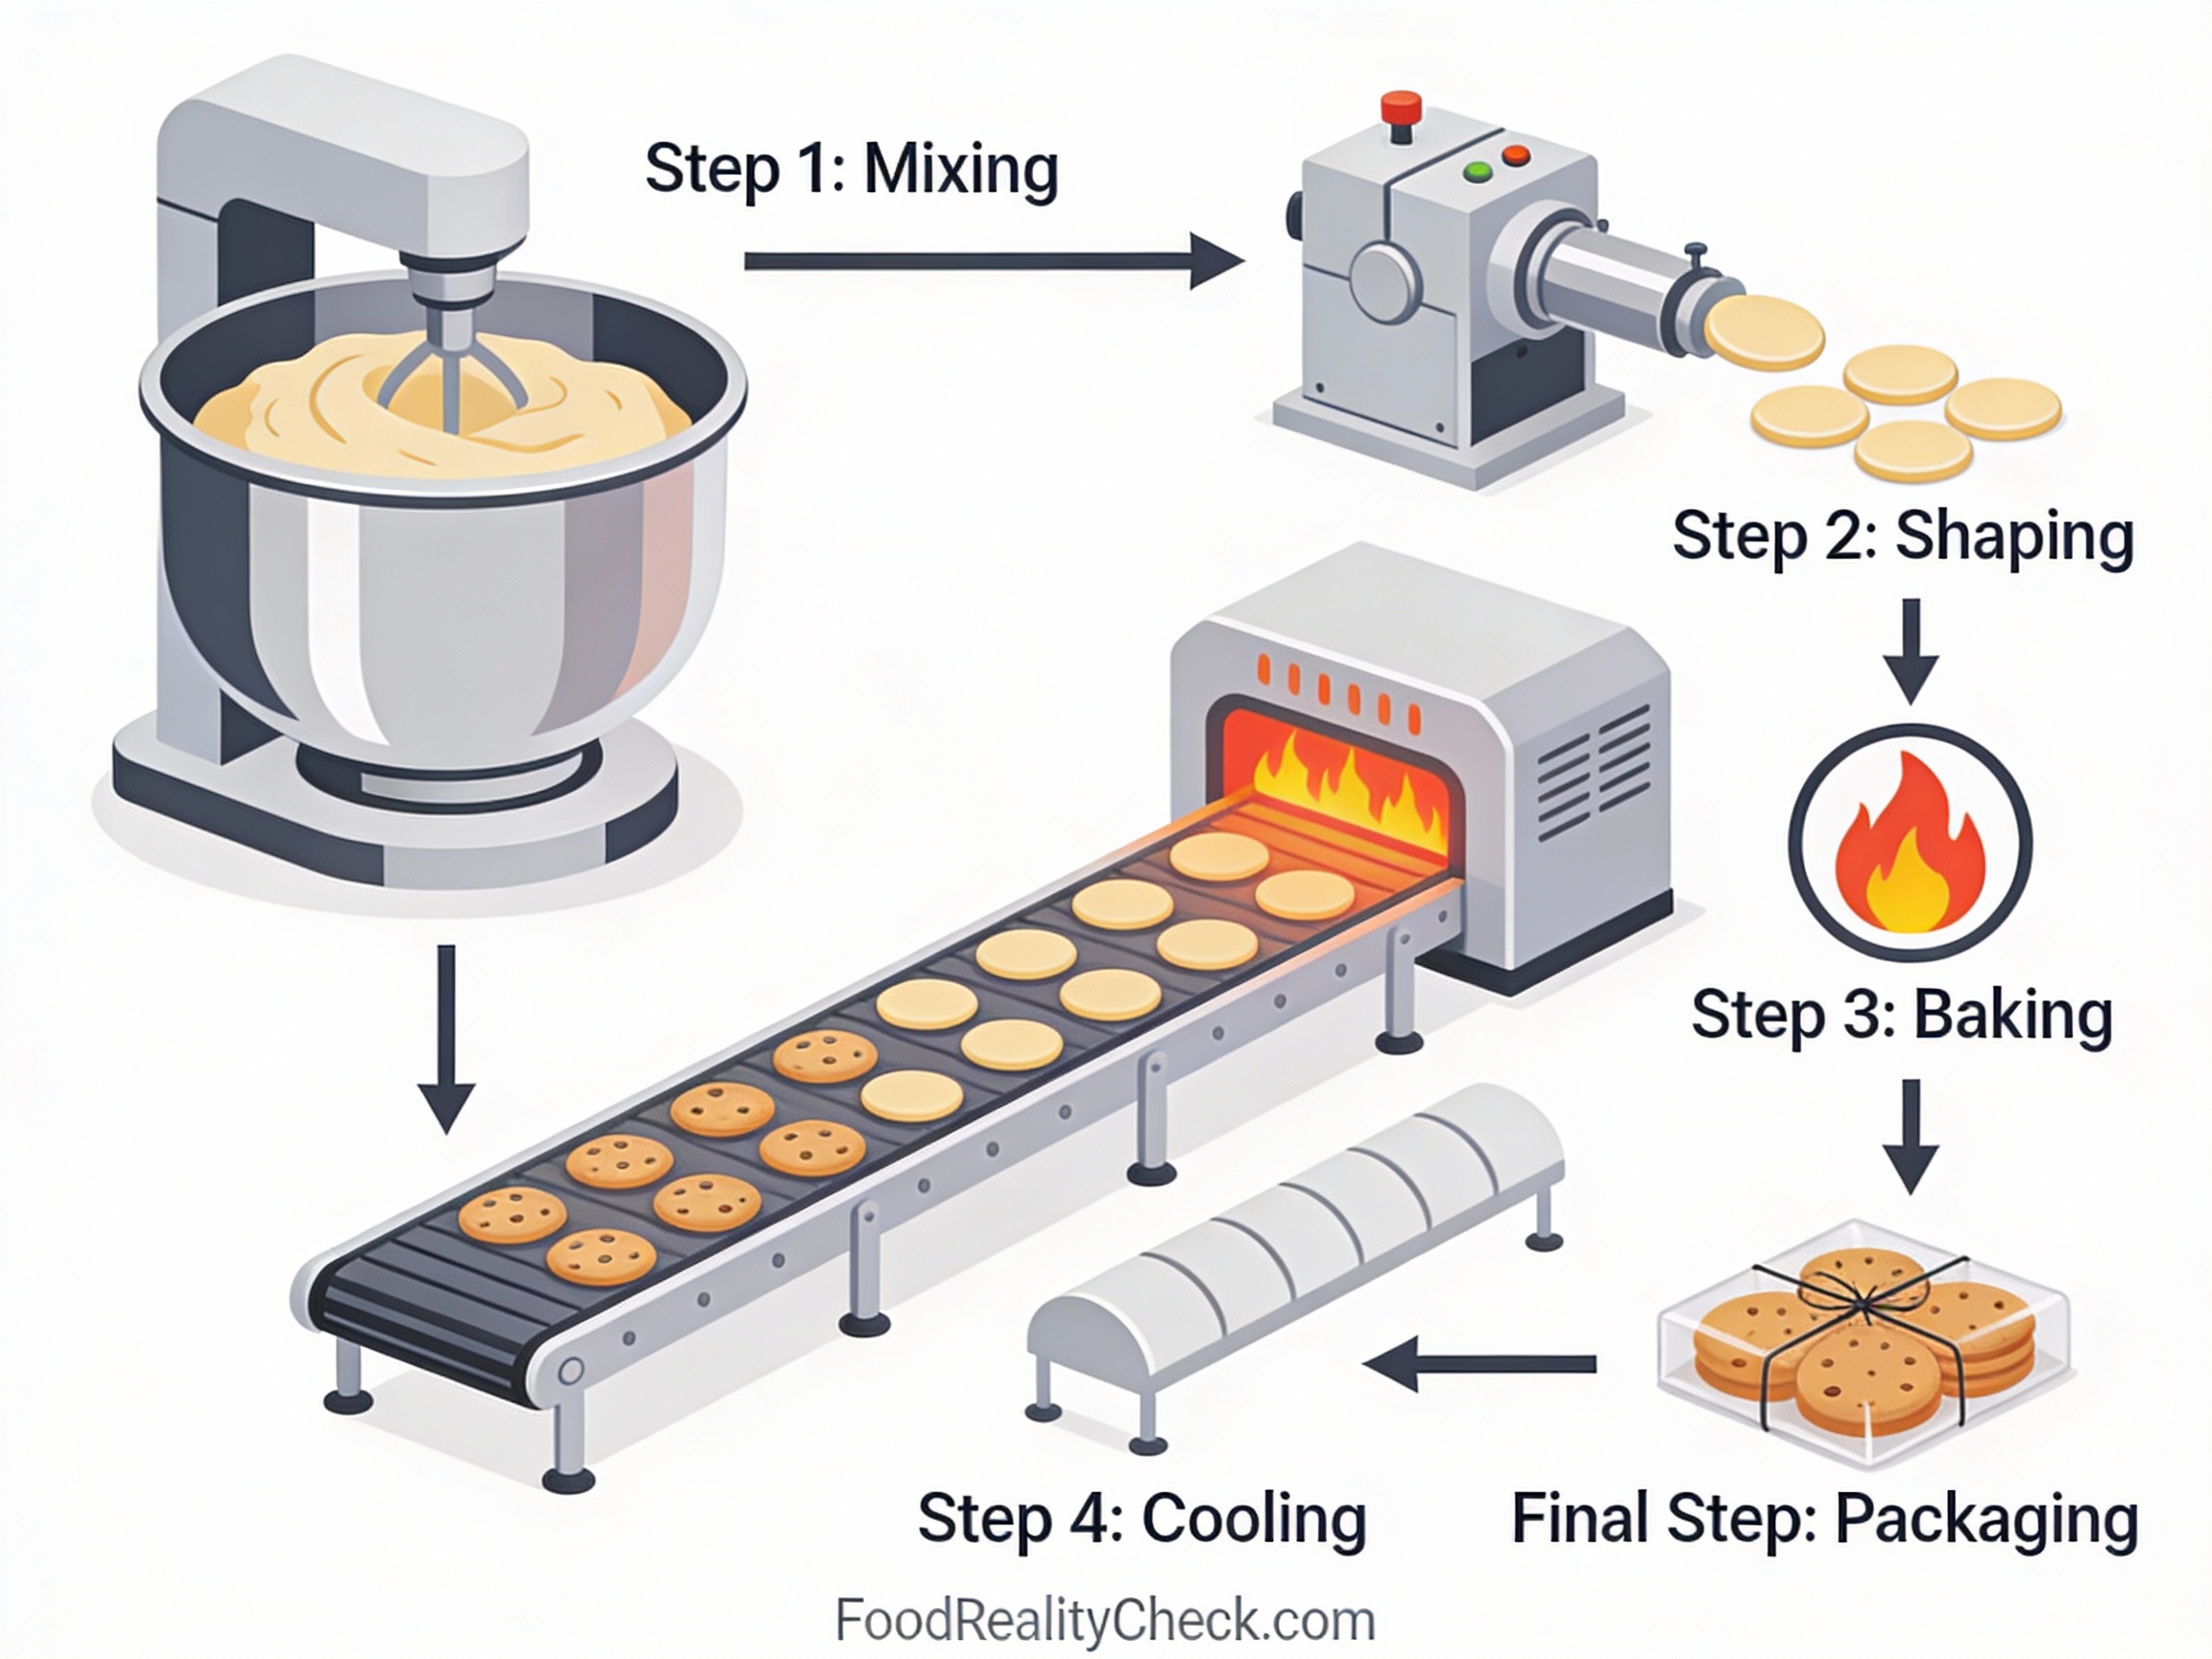
The manufacturing process transforms simple ingredients into millions of identical cookies annually through industrial-scale mixing, automated portioning and shaping, conveyor belt baking, and quality inspection before packaging.
Here’s exactly what happens from raw ingredients to finished cookies ready for snacking.
🥘 Main Ingredients
• All-purpose flour or specialty flour
• Butter or vegetable shortening (fat)
• Granulated sugar and/or brown sugar
• Eggs (or egg substitute)
• Vanilla extract or other flavorings
• Baking soda or baking powder
• Salt
• Optional: chocolate chips, nuts, dried fruit, cinnamon
Step 1: Ingredient Sourcing & Quality Control
Flour, sugar, butter, eggs, and other ingredients arrive at the bakery facility from suppliers and are immediately tested for quality, moisture content, and absence of contamination.
Flour moisture is critical—too dry and dough becomes brittle; too wet and it becomes sticky. Modern facilities use moisture analyzers to verify flour specifications before allowing it to production.
Ingredients are stored in climate-controlled areas (50-60% humidity, 18-22°C) to prevent moisture absorption or loss that would affect final product consistency.
Step 2: Dry Ingredient Mixing
In separate holding tanks, dry ingredients (flour, baking soda, salt, optional spices like cinnamon) are combined and sifted or blended to ensure complete, uniform distribution of leavening agents.
Proper distribution prevents uneven rising during baking—clumps of baking soda would create unpleasant metallic flavors in local areas.
The dry mixture is measured precisely by weight to ensure batch-to-batch consistency.
Step 3: Creaming Fat & Sugar (Industrial Mixing)
Softened butter (or shortening) and sugar are loaded into large industrial planetary mixers (400-800 liter capacity) and beaten at medium-high speed for 5-10 minutes.
Creaming incorporates air into the fat, creating tiny bubbles that will expand during baking and produce lighter, more tender cookies.
The mixture changes from granular to pale, fluffy, and nearly doubled in volume—the creaming phase is complete when it looks like whipped cream.
Step 4: Egg & Flavor Incorporation
Beaten eggs and vanilla extract are added to the creamed mixture at low speed and mixed just until fully incorporated—typically 1-2 minutes.
Overmixing at this stage incorporates too much air, creating a cake-like texture instead of the desired tender, dense cookie crumb.
The batter should look smooth and uniform with no visible streaks of white.
Step 5: Dry Ingredient Integration (Low-Speed Mixing)
The reserved dry ingredients are added to the wet mixture in 2-3 portions at the lowest mixer speed, mixing just until combined after each addition.
Low speed is critical—high-speed mixing develops gluten (wheat protein network), making cookies tough and cake-like instead of tender and crumbly.
Mixing stops as soon as no dry streaks are visible—any additional mixing would overdevelop gluten and ruin texture.
Step 6: Mix-In Addition (Chocolate Chips, Nuts, etc.)
For chocolate chip cookies, nuts, or dried fruit, these are folded in by hand or at very low mixer speed after the flour is incorporated.
Gentle folding prevents breaking chips or nuts and ensures even distribution throughout the dough.
The finished dough is now complete and ready for portioning—it should be thick, cohesive, and studded with visible add-ins.
Portioning, Shaping & Baking
Step 7: Dough Resting (Optional Chilling)
Some commercial operations chill the dough for 20-30 minutes to make it firmer and easier to portion without spreading.
Cold dough also bakes more slowly, allowing cookies to set before the edges burn—producing thicker, chewier cookies with better shape definition.
However, modern high-speed production lines often skip this step for faster throughput, using warmer dough that flows faster through portioning equipment.
Step 8: Automated Portioning (Depositing)
Dough is loaded into automated portioning machines (depositors) that dispense uniform amounts onto conveyor belts or baking sheets at rates of 300-500 portions per minute.
Portions are measured by weight or volume—typically 25-40 grams per cookie depending on desired size.
Modern equipment uses servo-driven pump systems that adjust flow rate in real-time to maintain consistent portions despite dough viscosity variations caused by temperature changes.
Step 9: Spacing & Pre-Shaping (Optional)
Portioned dough is spaced evenly on baking sheets with approximately 2-3 inches between pieces to allow for spreading during baking.
Some operations use pre-shapers (gentle rollers or presses) that flatten the dough mounds to a consistent thickness, ensuring uniform baking.
Others skip shaping and allow cookies to spread naturally in the oven—this produces slightly irregular shapes more consistent with “homemade” appearance.
Step 10: Oven Preheat & Temperature Calibration
Industrial ovens are preheated to 190-220°C (375-425°F) depending on cookie type and desired browning level.
Modern convection ovens use multiple heating zones at different temperatures—higher temperatures for the entry (rapid initial heat), lower temperatures for the exit (finishing without burning).
Temperature is continuously monitored and adjusted automatically by PLC systems to maintain tolerance within ±2°C.
Step 11: Conveyor Belt Baking (Continuous Process)
Baking sheets with portioned dough enter the oven on conveyor belts that slowly move through the heating chambers at speeds calibrated to produce the desired baking time (8-15 minutes depending on cookie size and type).
During baking, several chemical reactions occur: proteins coagulate, starches gelatinize, sugars caramelize (Maillard reaction), water evaporates, and baking soda reacts with acidic components.
As cookies bake, they spread, dome slightly, and turn golden brown—visual doneness indicators of 95-98% are monitored through oven windows.
Step 12: Baking Completion & Visual Assessment
Cookies exit the oven when they’ve developed the desired color and firmness—typically when edges are golden brown but centers are still slightly soft.
Underbaked cookies ensure softness and chewiness from residual heat; overbaked cookies become hard and crispy.
Modern ovens use spectral color analysis to automatically signal when batches are optimally baked, within millisecond precision.
Step 13: Cooling on Conveyor (First Phase)
Hot cookies exit the oven onto a separate slow-moving cooling conveyor at 15-20°C (maintained by air-conditioning or water-cooled rollers).
Cookies firm up during 5-15 minutes of cooling on the belt, allowing internal structure to set while remaining warm enough to prevent excessive hardening.
This intermediate cooling prevents cookies from sticking together when stacked or packed while they’re still too warm and plastic.
Step 14: Final Cooling & Quality Inspection
Cooled cookies fall from the conveyor into inspection chutes where automated vision systems scan each cookie for defects: cracks, improper size, incorrect color, missing pieces, or foreign objects.
Defective cookies are automatically ejected and diverted to scrap; acceptable cookies continue to packaging.
Manual spot-checking by food technicians provides final assurance of quality standards.
Packaging & Distribution
Step 15: Filling Bags or Trays
Inspected cookies are conveyed to automated packaging machines that count and fill cookies into bags, trays, or boxes at 200-400 units per minute.
Portion control is precise—each package contains exactly the target number of cookies (typically 15-25 per standard package).
Packaging material protects cookies from moisture and physical damage while displaying the product attractively.
Step 16: Sealing & Nitrogen Flushing (Optional)
Filled packages are sealed using heat sealing or ultrasonic sealing at the top, creating an airtight barrier.
Some premium products use nitrogen flushing—inert nitrogen gas is pumped into the package as it’s sealed, displacing oxygen and preventing staling (oxidation and moisture loss).
Nitrogen flushing extends shelf-life from 3-4 months to 6+ months while maintaining fresh taste and texture.
Step 17: Labeling & Batch Coding
Sealed packages move to labeling machines that apply front and back labels, nutrition facts panels, ingredient lists, and barcode.
Batch codes and “best by” dates are printed using thermal transfer or laser marking for traceability.
Vision inspection verifies label placement and legibility before packages proceed to case packing.
Step 18: Case Packing & Palletizing
Labeled packages are robotically packed into cardboard cases (typically 12-24 packages per case depending on package size) and placed on pallets.
Cases are wrapped with plastic film for stability during shipping and stacked in climate-controlled warehouses at room temperature (18-22°C, 50-60% humidity).
Proper storage prevents staling (moisture loss), preventing cookies from hardening prematurely.
Step 19: Distribution & Retail Display
Packaged cookies are distributed via ambient temperature trucks to retail stores, vending machines, and food service establishments.
In retail, cookies are displayed in shelf-stable sections at room temperature—refrigeration is unnecessary and actually undesirable (condensation damages packaging).
Consumers purchase and consume within the printed “best by” date, typically 4-6 months from manufacturing.
Why This Process?
Creaming butter and sugar incorporates tiny air bubbles that expand in the oven, creating light, tender texture—skipping this step produces dense, cake-like cookies.
Low-speed mixing after flour is added prevents overdevelopment of gluten, which would make cookies tough and chewy instead of tender and crumbly.
Industrial conveyor belt ovens with multiple heating zones allow precise control over browning and doneness—uniform baking impossible with standard home ovens.
Nitrogen flushing extends shelf-life by displacing oxygen that causes staling and rancidity, allowing cookies to taste fresh months after baking.
What About Variations & Additives?
Cookie varieties vary dramatically based on ingredients and technique:
• Sugar cookies: High sugar-to-flour ratio, minimal mix-ins = crispy, buttery
• Chocolate chip cookies: Medium sugar, chocolate chips = chewy centers, crispy edges
• Oatmeal cookies: Oats replace some flour, add chewiness and texture
• Shortbread: High fat-to-flour ratio = crumbly, tender, melt-in-mouth
Commercial cookies typically contain:
• Baking soda (leavening agent)
• Dough conditioners or emulsifiers – for consistency
• Modified starches – for texture control
• Preservatives (potassium sorbate) – extend shelf-life
• Soy lecithin – for better mixing and texture
Premium artisanal cookies may contain only flour, butter, sugar, eggs, vanilla, and optional add-ins—minimal additives.
The Bottom Line
Cookie production is an industrialized baking process that combines careful mixing to control gluten development, automated portioning for consistency, and precise oven temperature control to create millions of identical cookies daily.
The key to quality is the creaming phase (incorporating air), low-speed mixing to prevent gluten overdevelopment, and precise oven time and temperature.
Now you understand exactly how flour and butter transform into cookies through industrial mixing, conveyor belt baking, automated inspection, and careful packaging.